Stripe Web Payments
RevenueCat currently supports web payments through Stripe. This allows you to let users subscribe on your own website using Stripe, and automatically unlock access based on the Stripe subscription through the Purchases SDK.
Remember that it is against Apple's App Store terms to provide a different system than in-app purchases for digital goods. Make sure you don't promote your web subscriptions from inside your app. Your app may get rejected, or banned.
Before launching your Stripe integration, be sure to read the limitations that apply to working with web payments.
1. Connect with Stripe
To get started, you first need to connect your Stripe account with RevenueCat, if you haven't already done so follow the instructions here.
2. Create products and plans on Stripe
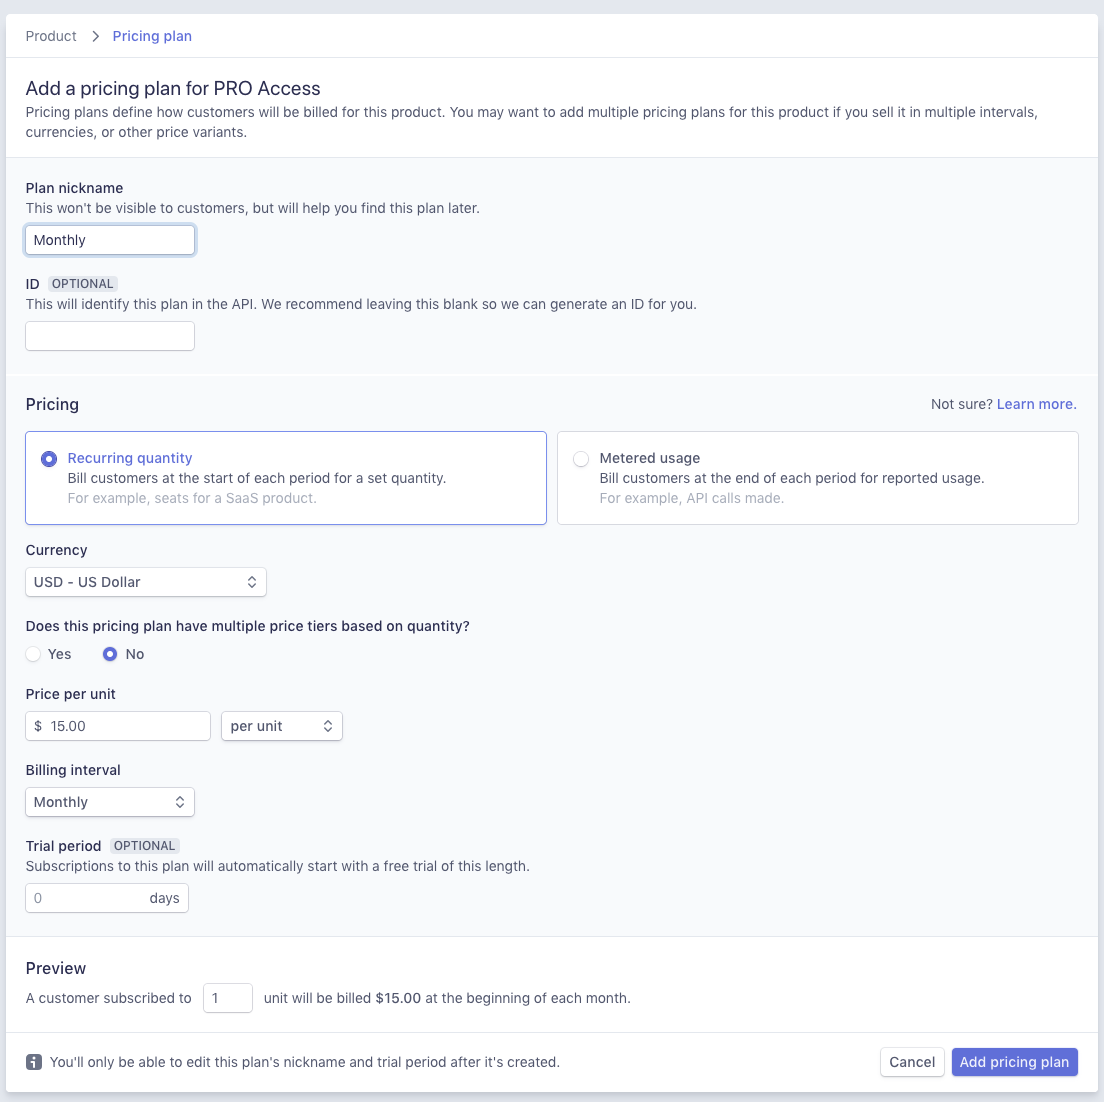
Create your Stripe product(s) using their billing dashboard. In Stripe, a product can have multiple pricing plans. These are useful if you want to offer different price points for the same product and work similar to offerings and products in RevenueCat.

You can read more about products and plans in their official documentation.
RevenueCat only supports per unit and recurring quantity subscription plans. Metered usage and tiers are currently not supported.
3. Create subscriptions on Stripe
The typical setup consists of a website that uses Stripe checkout to tokenize the customer payment information, and send this information to your server. After that, your server will be able to subscribe your customer to a product.
On the server-side, you can use Stripe's REST API or their library for your favorite programming language. An example can be found here.
Alternatively, you can also use the Stripe dashboard for manually creating the subscriptions for testing.
Ensure your session creates a Stripe Customer by setting customer_creation to always.
4. Add your Stripe products to your project's entitlements
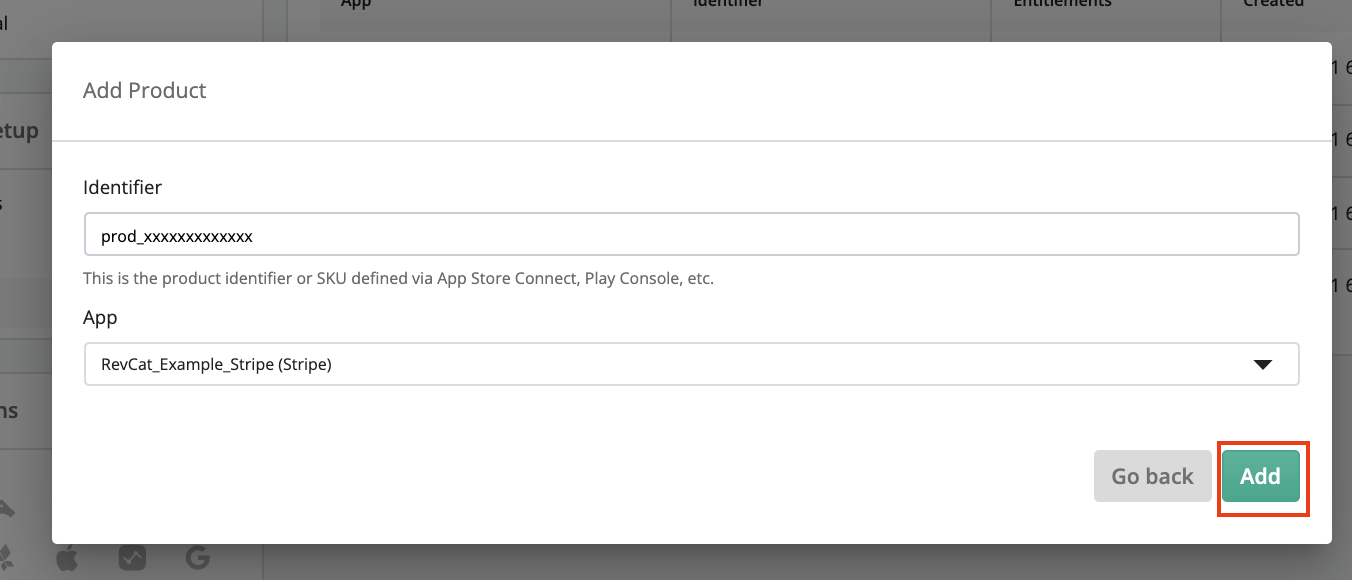
Add your Stripe products to your project's entitlements to easily group the products for your app. RevenueCat will send Stripe subscriptions to your app the same way we do for the other app stores.

In order for Stripe subscriptions to unlock entitlements, you must set a Product Identifier in the desired Offering to match a Stripe product ID exactly.
5. Send Stripe tokens to RevenueCat
You can send your Stripe subscriptions to RevenueCat through the POST receipt endpoint. When using Stripe Checkout, you should listen to and send subscriptions to RevenueCat after both the customer.subscription.created and checkout.session.completed events.
The only required fields are:
fetch_token: Your Stripe subscription ID (sub_...) OR your Stripe Checkout Session IDapp_user_id: The App User ID that the subscription should be applied to
Headers
X-Platform: Should be set tostripe.Authorization: It should beBearer YOUR_REVENUECAT_STRIPE_APP_PUBLIC_API_KEY
Stripe subscriptions are automatically refreshed by RevenueCat the same way as subscriptions from the app stores. This means that it may take up to two hours for a Stripe cancellation to be reflected in the RevenueCat backend. Alternatively, you can re-post the same subscription to RevenueCat after a user has cancelled, and it will be updated right away.
- Code
curl -X POST \
  https://api.revenuecat.com/v1/receipts \
  -H 'Content-Type: application/json' \
  -H 'X-Platform: stripe' \
  -H 'Authorization: Bearer YOUR_REVENUECAT_STRIPE_APP_PUBLIC_API_KEY' \
  -d '{ "app_user_id": "my_app_user_id",
  "fetch_token": "sub_xxxxxxxxxx"
  }'
One-time Stripe purchases
RevenueCat supports one-time purchases as well as subscription purchases through Stripe.
One-time purchases require using Stripe Checkout, and you'll need to send us the Checkout Session ID as the fetch_token. Additionally, you'll need to use Stripe's Prices objects. RevenueCat supports both one-time purchases and subscriptions made through Stripe Checkout.
In order for a Stripe subscription to be honored within an app, the Purchases SDK needs to be configured with the same App User ID associated with the Stripe subscription.
6. Test your Stripe subscriptions
You can test your implementation for Stripe and RevenueCat by using Stripe's test mode.
The subscriptions you create using this environment will be considered sandbox transactions in RevenueCat.
Stripe allows using test clocks to manipulate how subscriptions move through time. Since using test clocks lead to time divergences between Stripe and RevenueCat, data may not be accurately reflected in RevenueCat when using Stripe test clocks.
Working with web payments
Subscription payments through the web are processed with the same logic as subscriptions through the app stores. This means there are currently some limitations that must be considered for web payments to work properly.
Pricing in RevenueCat Charts and customer events will reflect any coupons applied to a Stripe purchase.
Supported subscription plans
Only Package Pricing and Standard Pricing subscription plans with per unit pricing are supported. Metered usage and tiers are currently not supported. This is currently how the app stores behave.
Upgrading and downgrading
Prorated amounts are not factored into MRR or Revenue calculations. If someone changes plans, the default behavior in Stripe is to give the user credit for any unused portion and bill them for the remainder of the new plan cost. You need to disable this behavior manually, or by passing the prorate=false flag through the Stripe API for accurate revenue calculations in RevenueCat.
Cancellations
When a subscription is cancelled in Stripe, you have two options:
- Immediate cancellation: The subscription is cancelled immediately, with the option to pro-rate or not.
- Cancellation at the end of the period: The subscription is cancelled at the end of the current billing period (this is how the app stores behave).
Both options are supported by RevenueCat, but the MRR and Revenue calculations will only be accurate in the first case if you choose not to prorate.
Cancellations in Stripe are automatically detected by RevenueCat the same way as subscriptions from the app stores. This means there may be up to a two-hour delay between when the subscription is cancelled in Stripe and when the cancellation is reflected in the RevenueCat backend.
Billing Issues
When a customer encounters an issue with their payment, RevenueCat will generate a billing issue event in the RevenueCat Customer History. If all retries for a payment fails, you have three options:
- cancel the subscription: RevenueCat will revoke access.
- mark the subscription as unpaid: RevenueCat will revoke access.
- leave the subscription as-is: RevenueCat will not revoke access.
You can find these options, along with your Retry schedule, in your Stripe dashboard under Settings > Billing > Subscriptions and email > Manage failed payments.
If you are expecting a billing issue event, it may take a few hours for the RevenueCat dashboard to display the event. Note that we will only generate the billing issue event once and we do not generate new ones when subsequent retries fail.
You can now allow users to subscribe from the web or within your app, and let them access their subscription anywhere.